How to make a lighted sign box?
Share

To make a lighted sign box, follow these general steps:
Materials Needed:
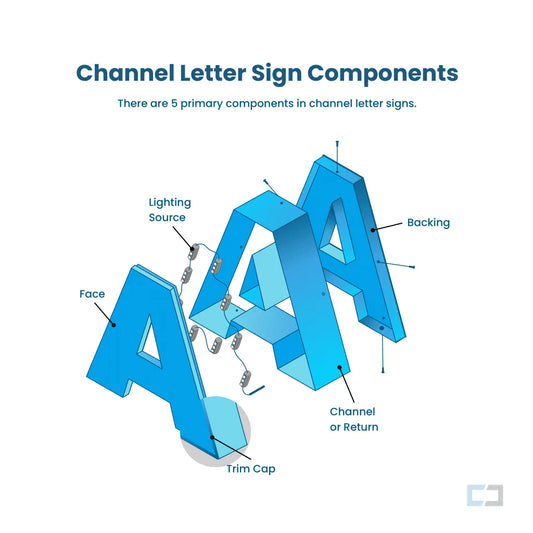
- Frame: Wood, metal, or aluminum for the sign box frame.
- Back Panel: A durable material like acrylic or plywood for the backing.
- Front Panel: Clear acrylic or polycarbonate for the front display panel (can be frosted or printed with a design).
- LED Strip Lights: To illuminate the sign box from the inside.
- Power Supply: Appropriate transformer for the LED lights.
- Mounting hardware: Screws, glue, or adhesive strips for securing the components.
- Vinyl/Printed Design: For branding, logo, or artwork to be displayed.
- Wiring tools: For connecting lights to the power supply.
- Aluminum or plastic trim: To finish and protect the edges.
Steps:
1. Build the Frame
- Cut your material (wood or metal) into four pieces based on the desired size of your sign box.
- Assemble the pieces into a rectangular frame using screws or brackets. Ensure it's sturdy enough to hold the back and front panels.
2. Attach the Back Panel
- Attach the back panel to the frame, securing it tightly with screws or adhesive. This will be the surface where the lights will be mounted.

3. Install LED Lights
- Place LED strip lights around the inner edges of the frame or on the back panel, facing outward to evenly light the front panel.
- Connect the strips to the power source using the appropriate wiring, ensuring that the power supply can handle the voltage and amperage of the LEDs.
4. Prepare the Front Panel
- Cut your acrylic or polycarbonate front panel to fit snugly into the frame.
- Apply your custom design, vinyl letters, or printed artwork onto the acrylic. If using frosted acrylic or printed material, ensure the graphic is visible and crisp.
5. Attach the Front Panel
- Secure the front panel onto the frame with mounting hardware or clips.
- Add plastic or aluminum trim around the edges for a finished look and to protect the acrylic panel from damage.
6. Test the Lighting
- Once everything is assembled, turn on the LED lights to check for even illumination. Adjust the lights if needed to prevent shadows or dark spots.
7. Mount the Light Box
- Use appropriate mounting hardware to hang or fix the sign box onto a wall or surface. Make sure the box is securely fastened and that all electrical connections are safe and functional.
Tips:
- Ensure the LED lights are evenly spaced to avoid uneven lighting.
- You can add a dimmer switch to control the brightness.
- If using outdoors, ensure all materials are weatherproof and that the wiring is safely insulated.
This method provides a basic guideline for creating a custom lighted sign box, whether for personal use, business signage, or decoration.


